Warhol-ification — A tutorial on creating a Warhol-like screen print effect with Photoshop
A walk through of how to turn a photograph of yourself into an Andy Warhol style graphic, like the one below.
Disclaimer: there are many different techniques for Photoshop. This tutorial describes the TOS unused for this piece, you may know different techniques and that is great. If you know better/different ways to do these techniques, do feel free to message me, I love to learn new things.
This tutorial may seem long, but it goes into quite a lot of detail because I wanted it to be suitable for beginners. Once you learn the techniques involved it will not take long to create similar artworks. I also hope that they’ll be useful for other pieces!
To get started you’ll need a photograph portrait (the higher resolution and contrast, the better effect you’ll get) and a copy of Photoshop. We’re going to create a black and white, high contrast version of the image, cut out the background and then we’ll trace shapes for the colours. (This tutorial works for photos of people with pale/white skin since this is the photo I was working with, apologies, maybe I’ll try and write one for darker skin colours in the future.)
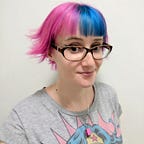
This tutorial uses the above photo, which was taken by (and of!) the very wonderful Alix Fox —find her on Twitter, and Instagram. She has created a beautiful series of photos for her online competition. Check it out here: https://www.instagram.com/p/CH_HWHQnp6D/
Let’s get started!
Desaturate and increase the contrast
The first thing to do is to use Photoshop’s Black & White tool to desaturate the image. The Black & White tool also provides controls to change how the picture looks in black and white. Increasing and decreasing colour values will change which parts show up as darker blacks or lighter whites. The white parts are where colour will show through (once we add colour) and the black will be the shading on top of that. In your copy of photoshop use the menu bar along to top to access:
Image > Adjustments > Black & White
Drag the colour sliders around until you have an image that has has pale skin and dark shadows which pick out the details. The values will depend on the photo you start with, but for this one I pushed yellows, blues and cyans right up. We end up with something like this:
(Note; we don’t want the eyeshadow to show up dark because we’re going to paint that in ourselves, so I’ve upped the blues to reduce its brightness, then we’ll remove it even further after we’ve traced the shape.)
Next we’ll increase the contrast even further, in your copy of photoshop use the menu bar along to top to access:
Image > Adjustments > Brightness/Contrast
Drag the contrast slider up until the model’s skin is basically blank/texture free. It doesn’t need to be perfect, we’ll clean up some bits and add some more contrast by hand afterwards.
Pick out details
We’re going to use the dodge and burn tools next, which are found in the toolbar on the left hand side. In your copy of photoshop use the menu bar on the left, then left click on the Dodge Tool icon to swap between the two.
The dodge and burn tools are brilliant, they lighten and darken colour respectively. We’re going to use the dodge tool to lighten the eyeshadow and the whites of the eyes, and then the burn tool to darken the eyelashes and add a little bit of shadow back under the cheekbones (because that beautiful makeup all got washed out!) You could also use these tools to pick out shadows and highlights in the hair if you want to increase the contrast there. Right click inside the canvas to change the width of the tool.
Zoom right in to areas to get nice fine detail. (Press and hold alt and scroll your mouse wheel (if you have one!) to zoom in and out quickly and easily, otherwise ctrl++ and ctrl+- or the Magnifying Glass icon).
Drag the canvas about while zoomed in by pressing and holding the spacebar, the cursor will turn into a little hand icon which means you can drag the canvas without changing tools. Or you can select the hand tool form the toolbar on the left to drag the canvas about then swap back to your dodge and burn tools.

Do the same with the whites of the eyes (and any blemishes you wish to remove!) Then we’ll move in with the burn tool on the eyelashes, the cheekbones, brows and the beauty mark. You can do nostrils, hands, hair, basically anything you think needs a little contrast boost:

Now for the long bit! Tracing the shapes!
Tracing with the Pen Tool
We’ll start by cutting out the background. We’re going for a screen printed look so it doesn’t have to be perfect, which is a relief because cutting around hair is a nightmare!
We’ll use the pen tool to draw a line then turn it into a selection.
Remove the background
From the panel on the right, select the pen tool and then right click to select the freeform pen tool.
You’re going to draw around the edges of the portrait, don’t worry if it isn’t very neat, you can clean it up afterwards!
The pen tool basically creates a vector path on your canvas that you can “fill” (colour in) or “stroke” (draw a line along) or turn into a selection.

From the above gif you can hopefully see that the line you draw will become a path with points on it. Once drawn, you can zoom into the points and drag them about until you’re pleased with the line. With the pen tool still selected:
- Drag points on the line by holding down control as you click and drag a point.
- Add points to the line by clicking on the line.
- Remove points by clicking on the points.
- Change the curvature of lines by pressing control and dragging the “handles” on the point

Be more careful around things like finger shapes and nails etc, hair can just be nice flowy curves. Keep adjusting until you are happy with your line.
Then we’re going to join up the two ends with the pen tool to create a closed path:
Finally, turn your path into a selection by right clicking anywhere within the canvas with your pen tool selected and choosing “make selection”:
When prompted, set the feather radius to 0. Feathering makes the edges of your selection blurred, this is a useful technique for other pieces, but for this one we want a nice clean line.
Copy the area within the selection with ctrl + c.
Create a new layer on your artwork, layers are going to be our friend from here on out!
Then paste what you copied onto the new layer with ctrl + v.
You should now see a layer with a transparent background and your cut out image. Hide the layer below by pressing on the eye icon to the left of it.
(You can also delete the lower layers, but I like to keep them just in case!)
Let’s add in the block of background colour and then take a look at how we blend the two together. The first thing to do is copy and paste one of Warhol’s actual paintings into a new layer so that you can use the eyedropper tool to pick the colours:
You can hide/show this layer as you need using the little eye icon next to the layer.
Creating a Background
- Use the Eyedropper Tool to pick the background colour (or of course you can use a colour of your choice, you don’t have to use these colours!).
- Then create a new layer and use the Paint Bucket Tool to fill this layer with the background colour.
- Drag the newly created background layer below the other layers
- Select the layer with your cut out photo in it and set the “blend mode” to “Multiply”

Next we’ll fill in the pink of the skin using the Magic Wand Tool:
Select this tool from the bar on the left and click on the area of the photo that you cut out earlier. This will select the empty area. Then, from the menu at the top of photoshop choose:
Select > Inverse
Which will inverse the selection. Then create a new layer, eyedrop the pink from Warhol’s piece and use the paintbucket tool to fill the selected area on your new layer. Finally, drag this new layer below the cut out photo layer.

Rinse and Repeat
I’m afraid the rest is mostly tracing with our pen tool! (You’ll get faster at this as you get more practise in, I promise!) For each area of colour you’re going to create a new layer and draw some new shapes with your pen tool, then we’ll fill the shapes with colours picked from the Warhol graphic.
Colouring in the shapes
I’ll walk through the eyeshadow shapes, and you can repeat the same steps for the lips, teeth, toy etc.
- Trace the eyeshadow shapes using the freeform pen tool
- Clean up your lines and points (as you did before)
- Create a new layer
- Pick the eyeshadow colour from the Warhol picture
- With the Path Selection Tool (
) Select the paths you just drew, right click and select “Fill Subpath”. Click OK and the path will be filled with the eyeshadow colour!

Warhol over-paints his lips quite a bit, so don’t forget this detail when you’re outlining the lips! 💋
Remember, nothing has to be perfect because it is supposed to look like a screen print, which is done in layers and aligned by eye, and is therefore much less accurate than is possible with Photoshop!
The final bits are the hair and jewellery. These I did with the Paintbrush Tool:
Which means you’ll be painting them by hand, but you can of course use the pen tool if you’d prefer (the pen tool give a much smoother line than the paintbrush tool). If you’re lucky enough to own a tablet or tablet device then the pen tool is much more pleasant to use than it is with a mouse.
The jewellery is a new layer with white paint. Use the Paintbrush Tool to paint over the areas that contain jewellery, change the width of the Paintbrush Tool by right clicking on the canvas with the tool selected.

For the hair, we’ll pick the yellow colour from the Warhol layer and then do the same selection, inverse trick that we did to fill the skin, but then paint with the Paintbrush tool inside the hair section on a new layer:

If you make a mistake (like I did while making this gif), you can erase the painted area with the Eraser Tool.
And that is it!
Once you’ve traced around each of the shapes you should end up with something like this:
You can name the layers to help remember which is which if you like, by double clicking on the layer name and typing in a new one.
Then all you need to do is save as and save it as a jpg!
Don’t forget to save your photoshop file too! Then you can maybe to back and change the colours of the layers or play with the contrast of the photo image, whatever you like!
I hope that wasn’t too much
💖💖💖